13 of December of 2024
How to Embed a Report in Looker Studio: A Step-by-Step Guide

Isaac Correa
Looker Studio Templates
Productivity & Automation

Learn how to embed Looker Studio reports effortlessly on your website. A step-by-step guide to enable sharing, copy the embed code, and publish it.
Embedding a Looker Studio report takes four steps and about two minutes. The only thing that trips people up is the permissions setting — and it is easier to fix than it looks.
What Embedding Actually Does
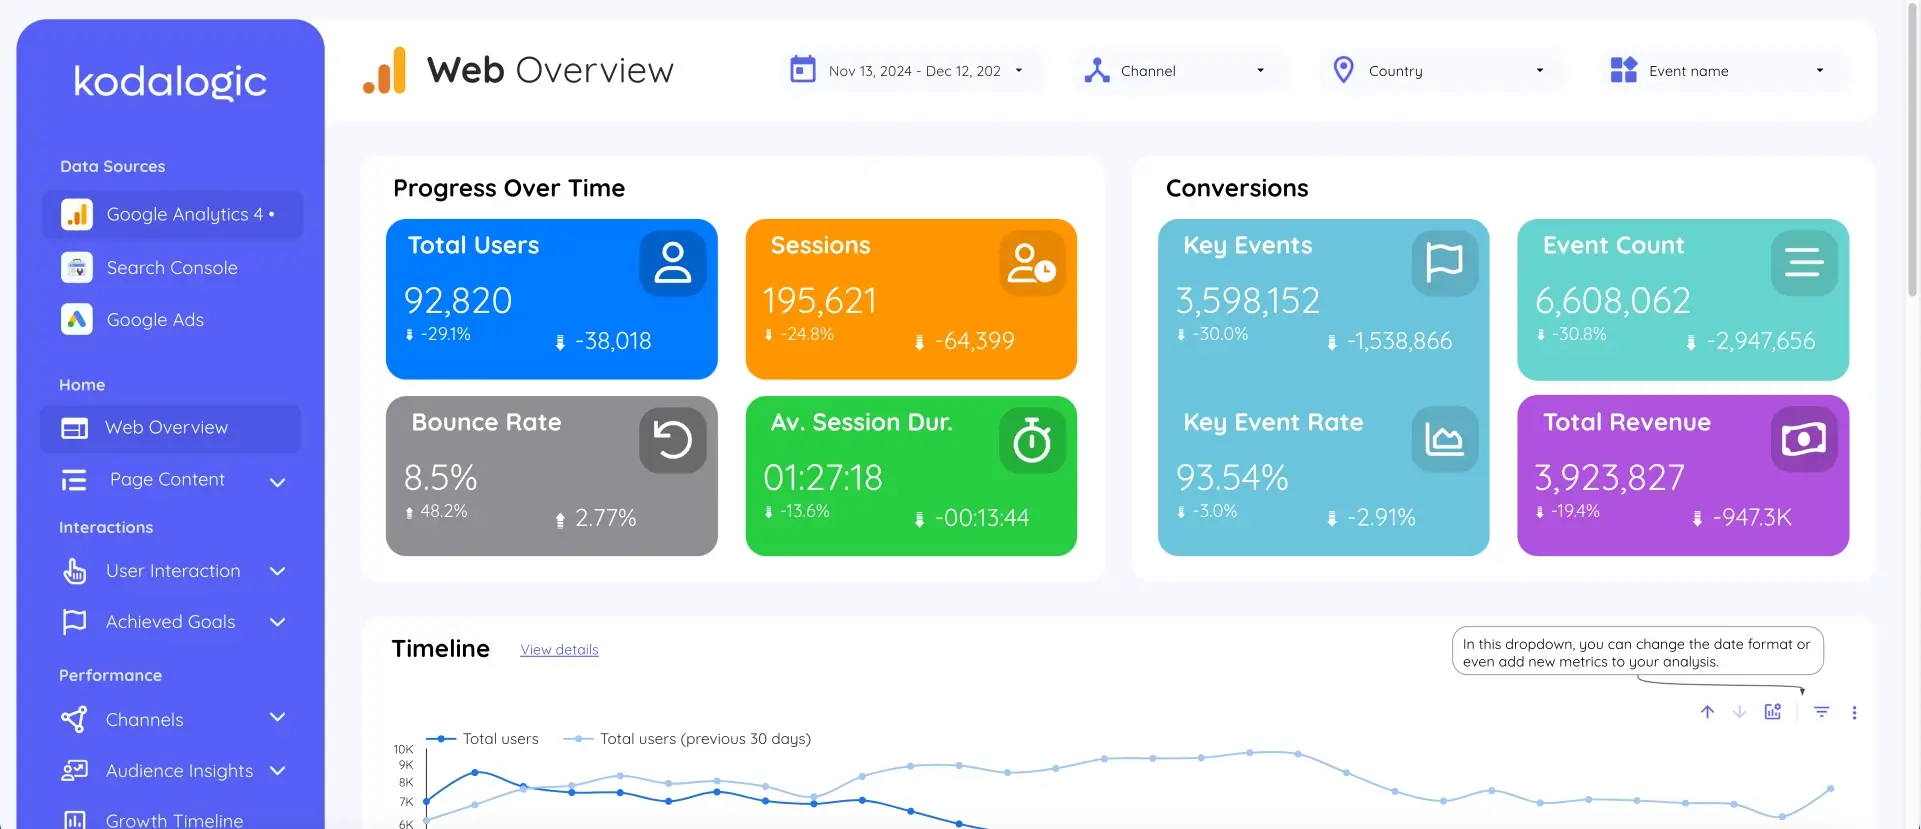
When you embed a Looker Studio report, you are placing a live, interactive version of that dashboard inside another page — your website, a client portal, a Notion workspace, a WordPress post, or any platform that accepts HTML iframe code.
The embedded report updates automatically. It is not a screenshot. It is not a PDF export. Anyone viewing the page sees the live data, with the same filters and date range controls they would have if they opened the report directly in Looker Studio. You can restrict what they can do (view only) or give them full interactivity — that is controlled by your sharing settings.
The use cases that come up most often are: adding a live dashboard to a client-facing website, embedding performance metrics inside an internal tool or intranet, placing a report inside a Notion page for team access, or embedding a dashboard in a WordPress site.
All of these follow the same process.
Before You Start: The Permission You Need to Set
This is where most people run into trouble. For a Looker Studio report to be embeddable, it needs to be accessible to the people who will view the embed — not just to you.
If you embed a report on a public website, the report itself needs to be set to "Anyone with the link can view" or the embedded version will show an error or a blank frame to anyone who is not logged in with a Google account that has explicit access.
If you are embedding for a specific internal audience — colleagues inside your organization, for example — you can keep the report more restricted and share it only with the relevant Google accounts or Google Workspace domain.
Decide on your access level before you start. You will set it in Step 2.
Step 1: Open Your Report in Edit Mode
Log in to Looker Studio and open the report you want to embed. Make sure you are in Edit mode — you will see the editing toolbar across the top of the screen. If you are in View mode, click the Edit button in the top right to switch.
The embed option lives inside the File menu, which is only accessible in Edit mode. This is the most common reason people cannot find it.
Step 2: Set the Sharing Permissions
Click the Share button in the top right corner. Then select Manage access.
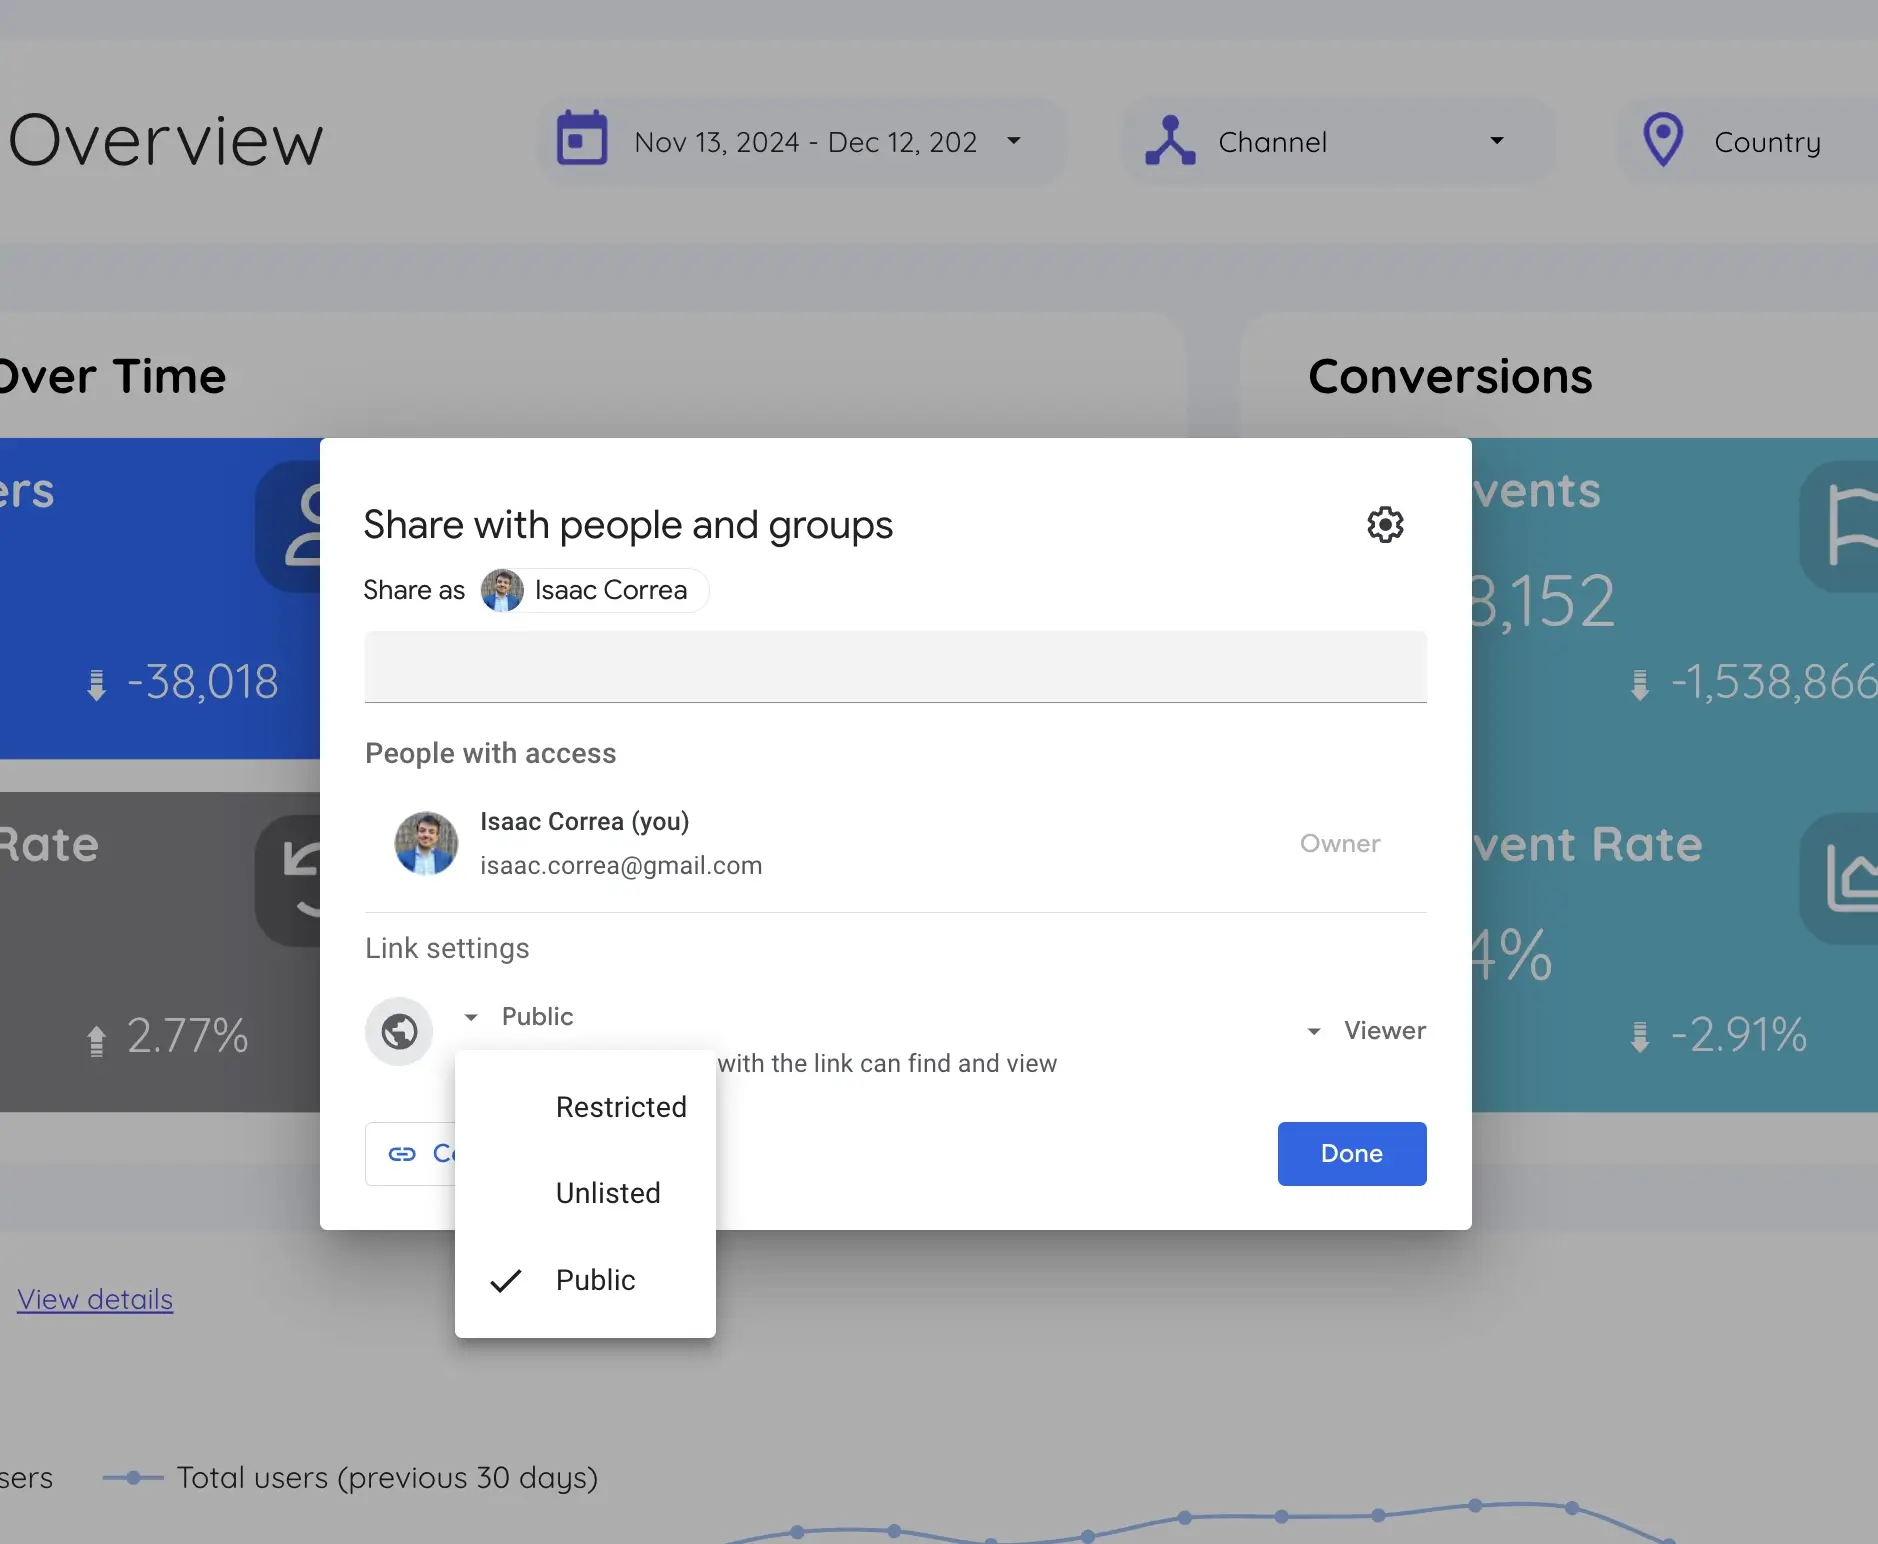
For a public embed — a website, a client portal, anywhere that non-Google-signed-in users might view it — change the link sharing setting to Anyone with the link can view.
For a private embed — an internal tool, a restricted client page — keep it set to specific people or your Google Workspace domain. Those users will need to be signed into their Google account when they view the embedded report.
Save the sharing settings and return to the report editor.
Step 3: Enable Embedding and Get the iframe Code
With the report open in Edit mode, click the File menu in the top navigation bar.
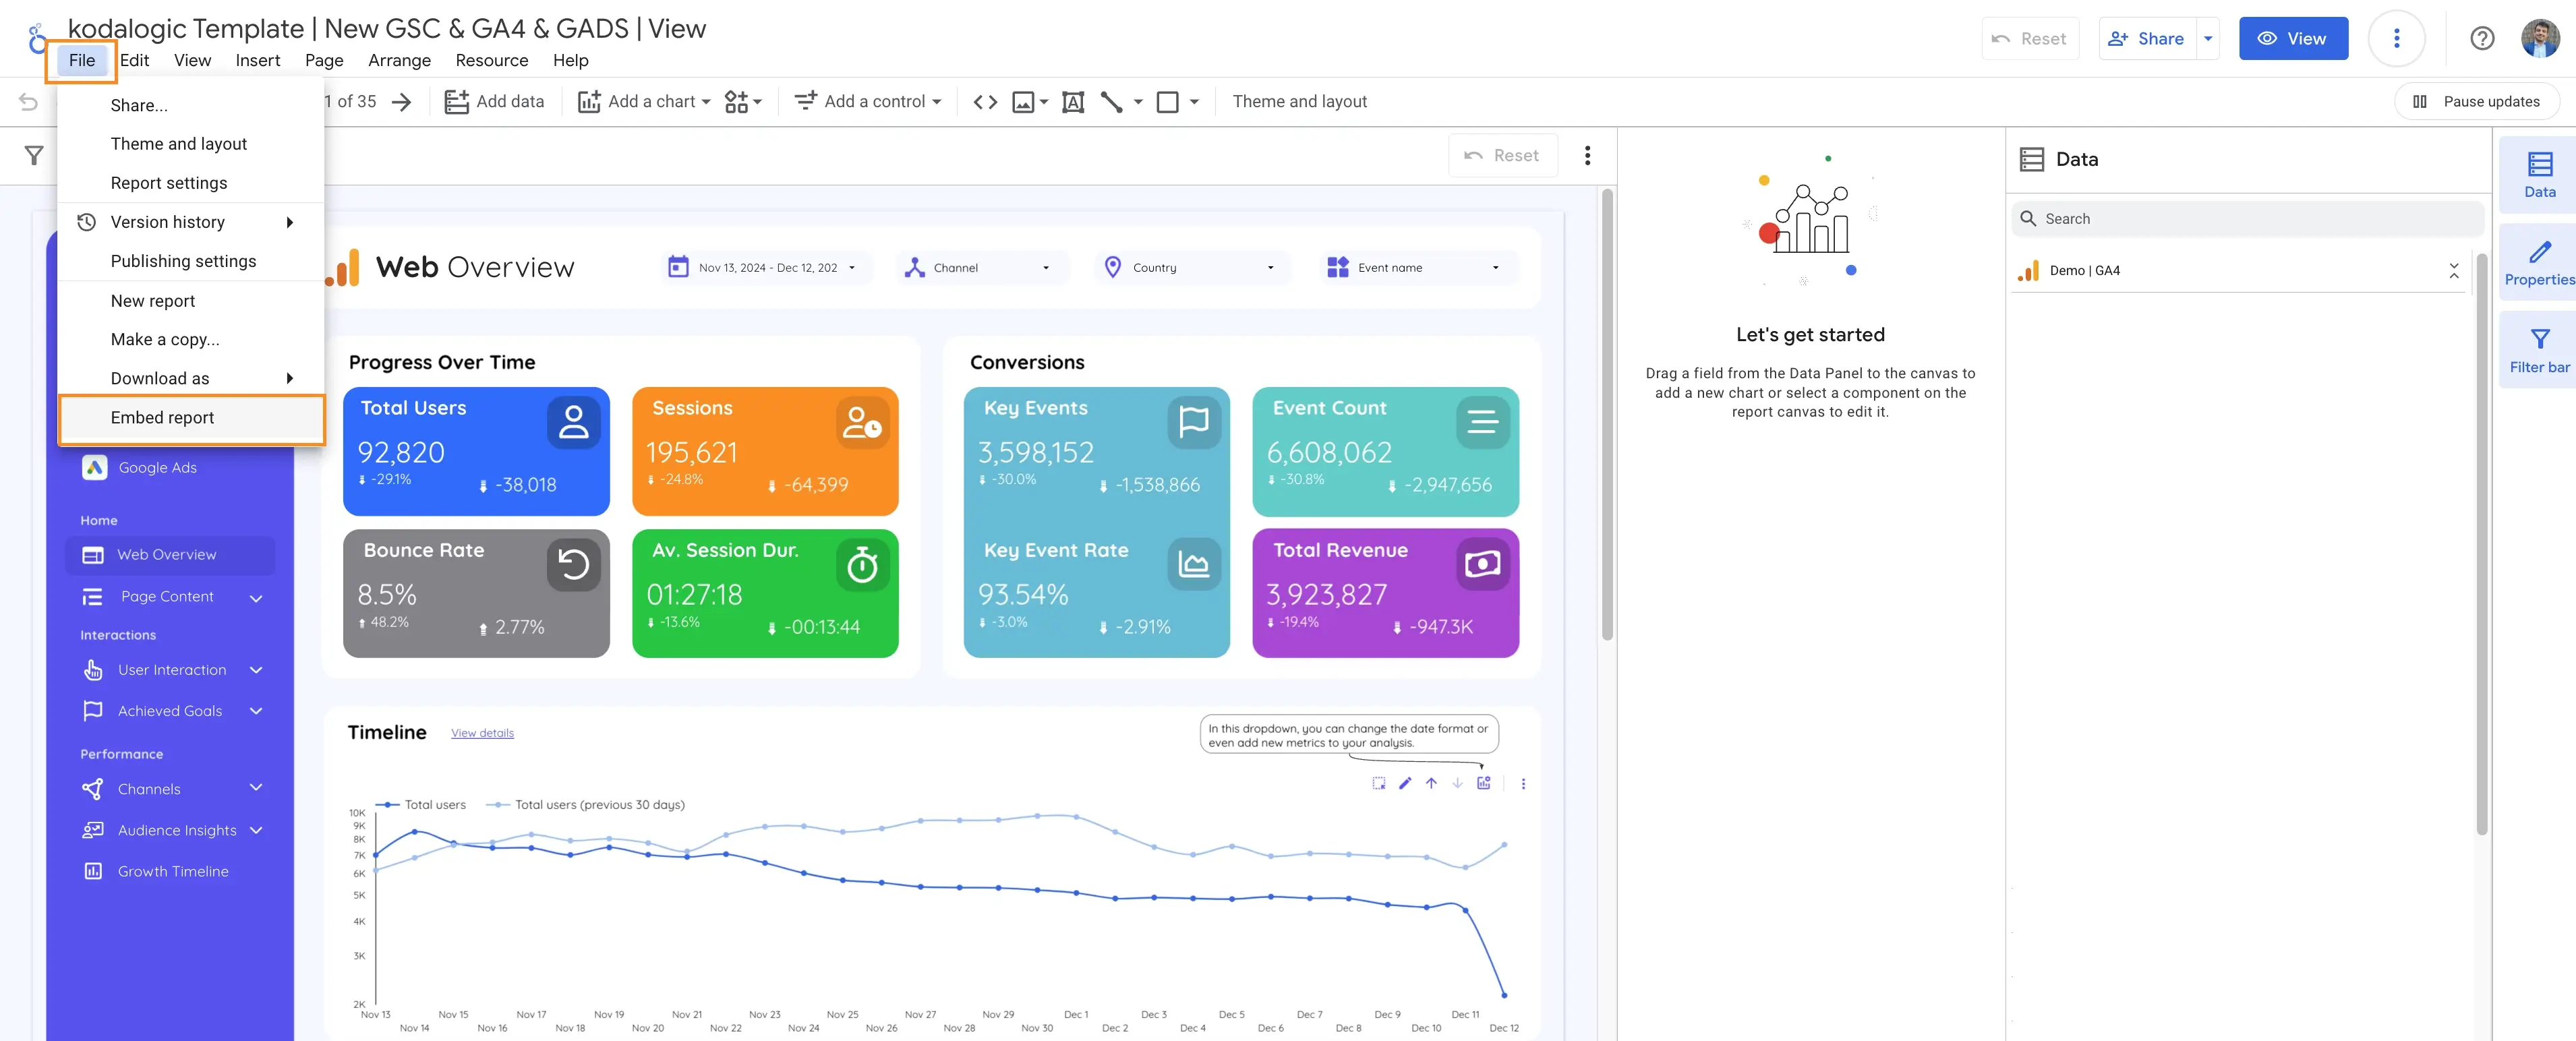
Select Embed Report from the dropdown. A popup will appear with an embedding toggle — turn it on.
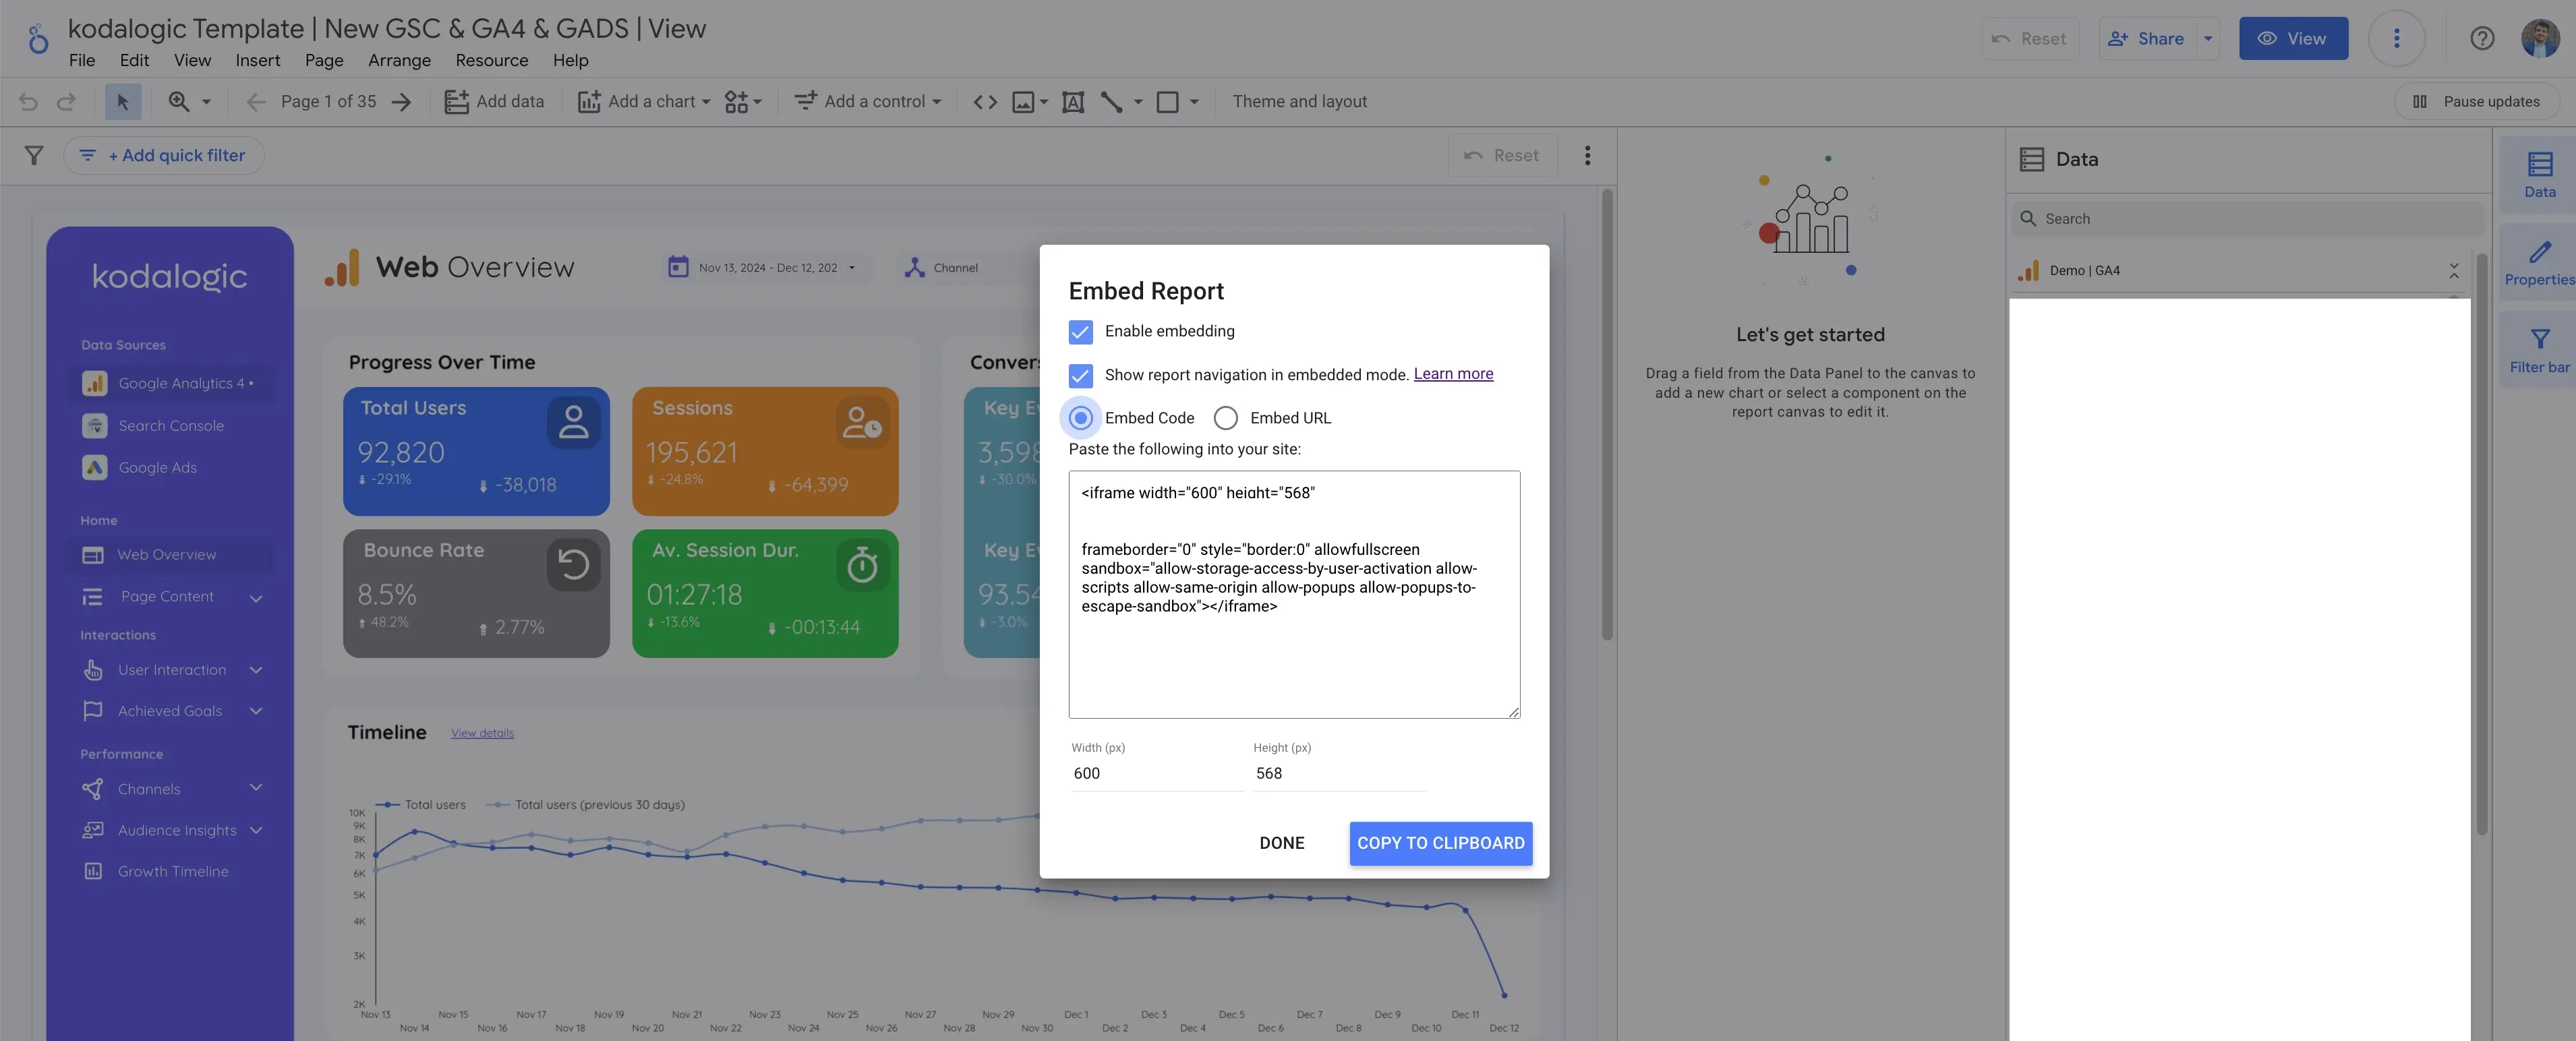
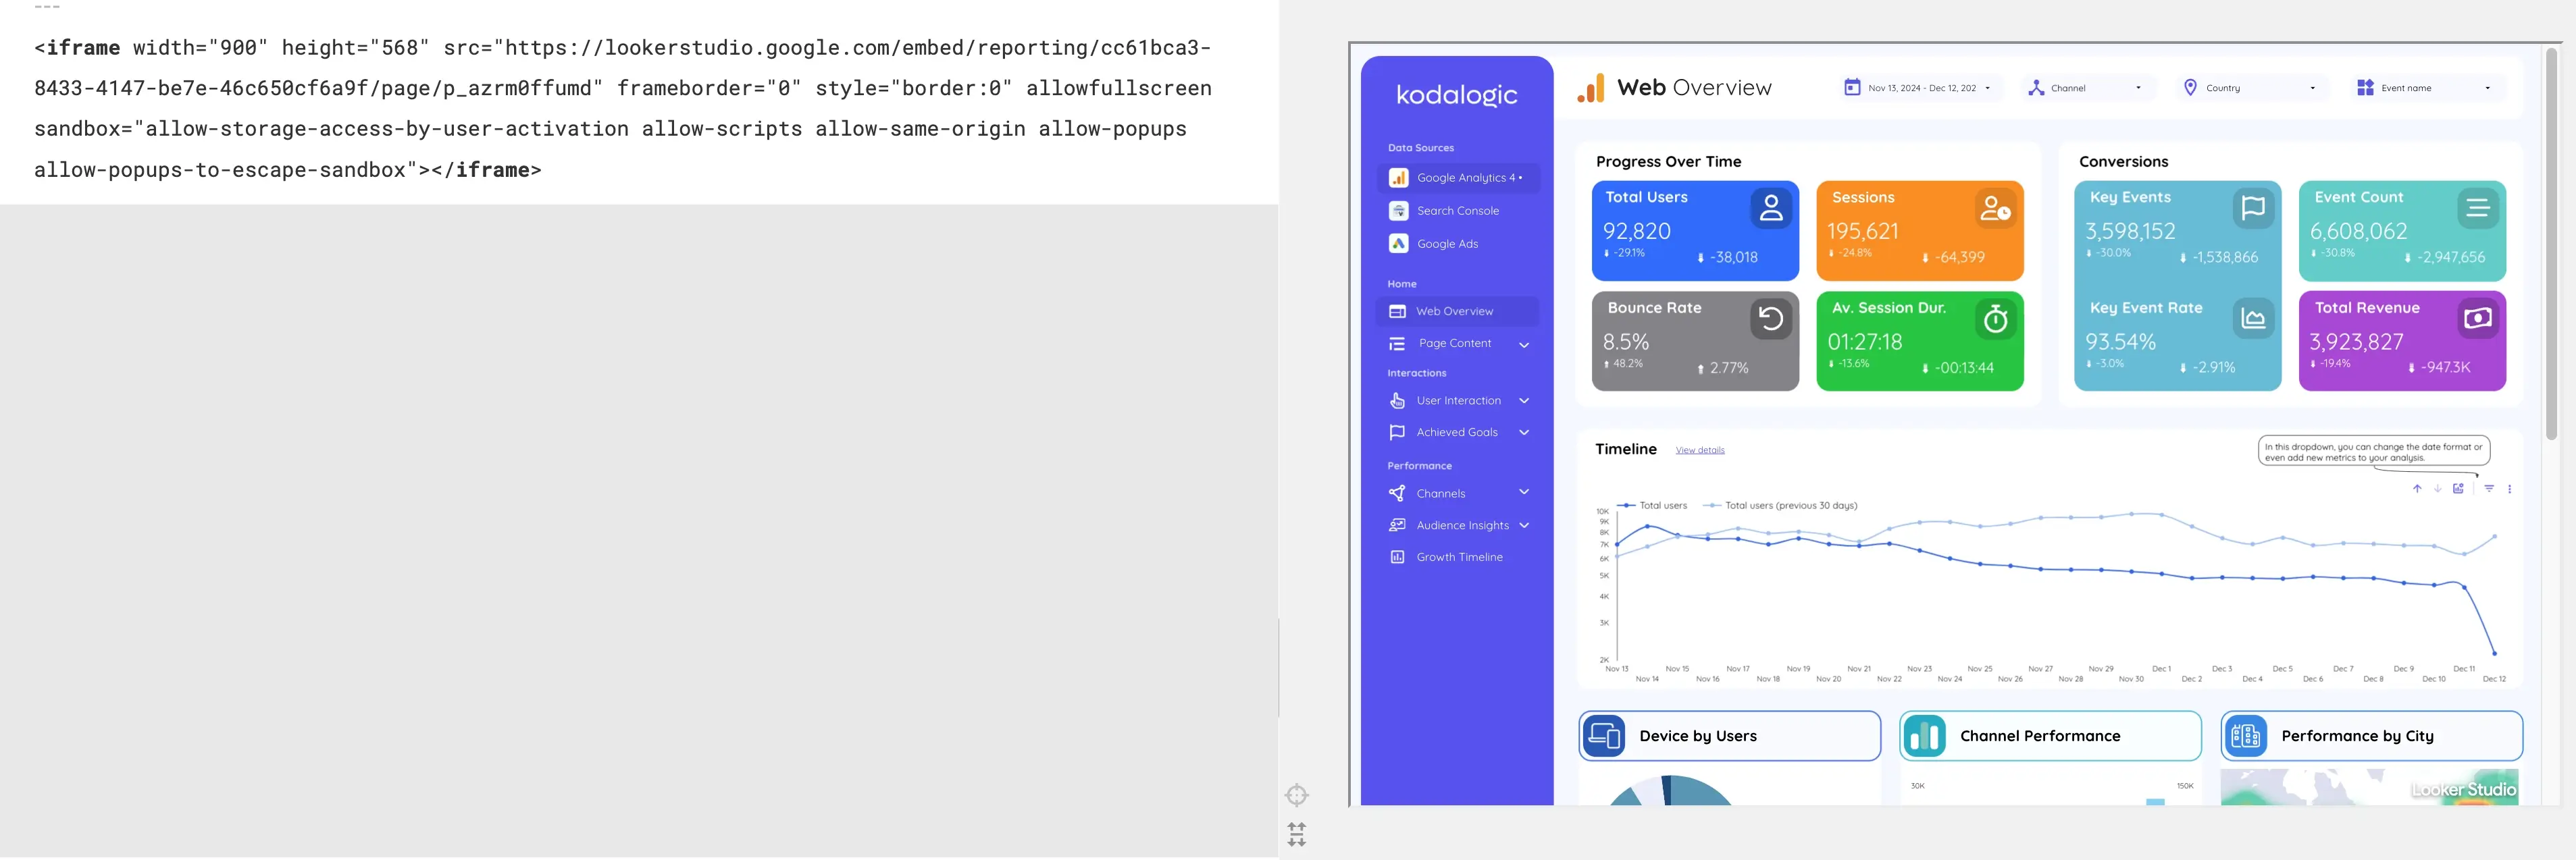
Once the toggle is enabled, Looker Studio generates an iframe code that looks like this:
<iframe
  width="800"
  height="600"
  src="https://lookerstudio.google.com/embed/reporting/..."
  frameborder="0"
  style="border:0"
  allowfullscreen
  sandbox="allow-storage-access-by-user-activation allow-scripts allow-same-origin allow-popups allow-popups-to-escape-sandbox">
</iframe>
Click Copy to copy this code to your clipboard.
Step 4: Paste the Code Where You Need It
How you paste the code depends on where you are embedding it.
On a standard website or HTML page: paste directly into the HTML of the page at the position where you want the report to appear.
On WordPress: switch the block editor to HTML view (the three-dot menu in a paragraph block gives you this option), then paste the iframe code. The Classic Editor has an HTML tab at the top of the editor panel.
On Notion: type /embed to insert an Embed block, then paste the full Looker Studio report URL — not the iframe code — into the URL field. Notion generates its own embed from the URL.
On Webflow, Squarespace, or similar platforms: look for an "Embed" or "HTML" block in the page editor and paste the iframe code inside it.
Adjusting the Size
The default iframe dimensions in the generated code are 800 pixels wide by 600 pixels tall. Change these numbers to match your layout:
<iframe width="1200" height="750" src="...">For responsive layouts where you want the report to fill the full width of its container, a common approach is to set width="100%" and let height be fixed, or use a CSS wrapper with padding-bottom set to the aspect ratio percentage you want.
The report content inside the iframe does not reflow — it stays at the dimensions you built it at in Looker Studio. If your report was designed at 1400 pixels wide and you embed it at 800 pixels, it will scale down or clip depending on the browser.
Common Issues and Fixes
The embedded report shows "You need access" or a login screen. This means the sharing permissions are not set correctly for the people viewing the embed. Return to Step 2 and verify that the sharing setting matches your intended audience.
The iframe appears blank. Usually a permissions issue on the hosting page. Make sure the page where you are embedding uses HTTPS — Looker Studio embedded reports do not load correctly on HTTP pages. Also check that the sandbox attributes in the iframe code are present and not stripped out by your CMS.
The report dimensions look wrong. Adjust the width and height attributes in the iframe code to match the space available in your layout. There is no right answer — it depends on your page design.
Viewers can see the report but cannot use the filters. Looker Studio viewer-level access allows filter interaction by default. If filters are not working, check whether the report's filter settings are set to allow viewer edits — this is configured inside the report editor under Report Settings.
A Note on What Gets Embedded
When you embed a Looker Studio report, the person viewing the embed sees the report as it was last saved — with all the visualizations, date controls, and filters you built. They see your data, not their own, unless the report is connected to a data source they have access to and the report is configured for data viewer mode.
For most embedding use cases — showing a client their dashboard, adding metrics to a website, sharing a department report on an intranet — this is exactly what you want. The embed shows a live version of the specific report you built.
Building a Report Worth Embedding
The embed process is simple. The part that takes time is building a report that is worth embedding — one that tells a clear story, loads quickly, and presents data in a format that makes sense to the person viewing it.
If you are embedding a GA4 performance report, a Google Search Console dashboard, or a Google Ads overview for a client, starting with a well-designed template saves significant time versus building from a blank canvas. The Kodalogic Looker Studio templates connect to your data in seconds and are built specifically for the reporting use cases that most often end up embedded — SEO performance, paid campaign results, and GA4 web analytics.
Every template supports embedding exactly as described above — the same four-step process applies regardless of whether you built the report yourself or started from a template.
→ Browse Kodalogic Looker Studio Templates